Sunday, 20 November 2016

How to get a random key in redis

Sometimes when we are on the redis prompt on an unknown database, we need to see some random key to know what sort of keys exist in this redis instance.
We can try the "keys *" command but it scans all the keys.
To get a random key, redis "randomkey" command can be used, as documented here.


As expected randomkey returns a random key from the dataset.


Monday, 14 November 2016

Redis Cluster - How to fix a cluster which is in broken state after migration

Sometimes in redis cluster, we need to expand the redis cluster by adding more machines. This is accomplished by adding more machines, making them as part of the cluster and resharding the existing cluster as explained here.

However, many times, the cluster is stuck in an inconsistent state when there is an error in resharding. This can happen because of many reasons like sudden termination of reshard script, redis timeout error while moving slots(in case the keys are too big), or if a key already exists in the target database(because it involves migration).

There is no quick fix to these problems, and one would have to understand the internals of how a slot movement happens.

But there is a general rule on what can be done to try to fix if a redis cluster is stuck in an inconsistent state during reshard/migration.

The following two are important ways to fix a cluster which was broken because of migration.


Run the Fix Script

Fixing a resharding error can be done by running the fix script provided by redis.
It can be run using

./redis-trib.rb fix 127.0.0.1:7000

We will need to change the ip address and port as per your configuration. Also, you only need to provide the ip address/port of only a single node which is part of the cluster. The configuration of the other nodes are read automatically by the script.


If the above cannot fix the cluster state, then you can follow the below step.

Setting the Cluster slots to a particular node.

Manually checking the keys in the unstable slot, and setting the slot to be served by a particular slot. We can execute the "cluster nodes" command on all the nodes and see if any slot in set in a migrating/importing state. If we are sure a slot belongs to a particular node and the node holds and serves the data for that slot, we can set the slot to that node by executing the cluster setslot <slot> node <nodeid> command as described here.

If a node 127.0.0.1:7000 does not have the correct configuration as per cluster nodes command executed on it, and it shows that the slot 1000 is with some other node, but for all other nodes, it shows that it is with the node with node id abcdefgghasgdkashd, then we need to correct the configuration of that node(127.0.0.1:7000). It can be executing like  the following.

redis-cli -h 127.0.0.1 -p 7001 cluster setslot 1000 node abcdefgghasgdkashd

The above command just assures the node 127.0.0.1:7000 that the slot 1000 is served by the node with node id abcdefgghasgdkashd, and that the node 127.0.0.1 should correct its configuration to affect the below.

Note that you need to run it if you are sure that all other nodes agree to it with their cluster nodes command, and you are sure that the data for slot 1000 resides in the node abcdefgghasgdkashd.


Friday, 11 November 2016

redis cluster - slave sync with master failed - client scheduled to be closed ASAP for overcoming of output buffer limits.

Sometimes while working with redis cluster, and while the master-slave replication happens, sometimes slave is not able to sync itself to the master.
While syncing, the slave's connection to the master breaks again and again.

The following are the logs on the slave instance(IP:Port are masked).

10 Nov 17:09:20.387 * Connecting to MASTER IP1:PORT1
10 Nov 17:09:20.387 * MASTER <-> SLAVE sync started
10 Nov 17:09:20.387 * Non blocking connect for SYNC fired the event.
10 Nov 17:09:20.387 * Master replied to PING, replication can continue...
10 Nov 17:09:20.388 * Trying a partial resynchronization (request 479e75d20ac03150de943a24d9b61300b6fa59d0:266086101935).
10 Nov 17:09:20.894 * Full resync from master: 479e75d20ac03150de943a24d9b61300b6fa59d0:266259284057
10 Nov 17:09:20.894 * Discarding previously cached master state.
10 Nov 17:10:31.281 * MASTER <-> SLAVE sync: receiving 3811948917 bytes from master
10 Nov 17:10:40.138 * MASTER <-> SLAVE sync: Flushing old data
10 Nov 17:11:11.933 * MASTER <-> SLAVE sync: Loading DB in memory
10 Nov 17:12:37.115 * MASTER <-> SLAVE sync: Finished with success
10 Nov 17:12:37.849 # Connection with master lost.
10 Nov 17:12:37.849 * Caching the disconnected master state.
10 Nov 17:12:38.866 * Connecting to MASTER IP1:PORT1
10 Nov 17:12:38.866 * MASTER <-> SLAVE sync started
10 Nov 17:12:38.866 * Non blocking connect for SYNC fired the event.

The error keeps repeating itself.
Somehow the error above does not give much clue. Just when the master-slave sync succeeds, connection with master is lost.

Looking at the master logs give more clue.
Below are master logs.

10 Nov 17:09:20.383 * Slave IP2:PORT2 asks for synchronization
10 Nov 17:09:20.383 * Unable to partial resync with slave IP2:PORT2 for lack of backlog (Slave request was: 266086101935).
10 Nov 17:09:20.383 * Starting BGSAVE for SYNC with target: disk
10 Nov 17:09:20.889 * Background saving started by pid 37651
10 Nov 17:10:30.557 * DB saved on disk
10 Nov 17:10:30.844 * RDB: 283 MB of memory used by copy-on-write
10 Nov 17:10:31.276 * Background saving terminated with success
10 Nov 17:10:39.561 * Synchronization with slave IP2:PORT2 succeeded
10 Nov 17:11:09.060 # Client id=2292912 addr=IP2:23666 fd=233 name= age=109 idle=9 flags=S db=0 sub=0 psub=0 multi=-1 qbuf=0 qbuf-free=0 obl=0 oll=7104 omem=127259816 events=rw cmd=psync scheduled to be closed ASAP for overcoming of output buffer limits.
10 Nov 17:11:09.160 # Connection with slave IP2:PORT2 lost.
10 Nov 17:12:38.861 * Slave IP2:PORT2 asks for synchronization
10 Nov 17:12:38.861 * Unable to partial resync with slave IP2:PORT2 for lack of backlog (Slave request was: 266261610586).
10 Nov 17:12:38.861 * Starting BGSAVE for SYNC with target: disk


The Key part is cmd=psync scheduled to be closed ASAP for overcoming of output buffer limits.

It seems to show that the slave connection was closed as it reached output buffer limits for the master.
Somehow we need to fix this.
There is a setting in the conf file
client-output-buffer-limit slave 256mb 64mb 60

Reading the excellent documentation seems to suggest that the two limits, 256 mb and 64 mb are two limits, hard limits and soft limits. If the client connection for slave exceeds 256 mb or exceeds 64 mb continuously for 60 seconds.

We can either increase this setting, and restart the master server, but it seems too much of an effort and a risk and restarting a master may make its outdated slave trying to become a master.
Thankfully, this can be changed at runtime by executing the following command on master server.


redis-cli -h MASTER_IP -p MASTER_PORT CONFIG get client-output-buffer-limit

It gives the output as 
1) "client-output-buffer-limit"
2) "normal 0 0 0 slave 268435456 67108864 60 pubsub 33554432 8388608 60"

Notice that the hard and soft limits for slave is 256 MB/64 MB (268435456/67108864 bytes)
We will update it to  1 GB/256 MB(1073741824/268435456 bytes) by executing the following command.


redis-cli -h MASTER_IP -p MASTER_PORT CONFIG set client-output-buffer-limit "normal 0 0 0 slave 1073741824 268435456 60 pubsub 33554432 8388608 60"

Note that depending on how far your slave is lagging behind the master and how fast your slave is able to consume the data from the master while syncing, you may have to increase the limit to more than 1GB/256 MB. Just be sure to go through the excellent documentation of client-output-buffer-limit in redis.conf.

After executing this command, we see that the slave succeeds in syncing with the master and does not give any other error.  


Below are the logs on slave after executing the command.

10 Nov 17:15:58.692 * MASTER <-> SLAVE sync started
10 Nov 17:15:58.692 * Non blocking connect for SYNC fired the event.
10 Nov 17:15:58.692 * Master replied to PING, replication can continue...
10 Nov 17:15:58.692 * Trying a partial resynchronization (request 479e75d20ac03150de943a24d9b61300b6fa59d0:266435075281).
10 Nov 17:15:59.195 * Full resync from master: 479e75d20ac03150de943a24d9b61300b6fa59d0:266612963059
10 Nov 17:15:59.195 * Discarding previously cached master state.
10 Nov 17:17:10.490 * MASTER <-> SLAVE sync: receiving 3811953308 bytes from master
10 Nov 17:17:19.613 * MASTER <-> SLAVE sync: Flushing old data
10 Nov 17:17:53.203 * MASTER <-> SLAVE sync: Loading DB in memory
10 Nov 17:19:19.332 * MASTER <-> SLAVE sync: Finished with success
10 Nov 18:01:31.139 * Background saving started by pid 16989


:)

Tuesday, 1 November 2016

How to move a single slot in redis cluster

In redis cluster, there are a total of 16384 logical slots, which are divided between multiple masters.
Often, when we need to add nodes to the redis cluster, we need to reshard the data.
This is done by redis-trib.rb utility file provided by redis.
However the redis-trib.rb utility can move N no of slots between masters, but it does not provide a function to move a single slot.
Moving a slot normally involves 3 steps as described here.


  1. setting the destination node to receive a slot.
  2. setting the source node to migrate a slot.
  3. migrating the data from source node to destination node.
  4. communicating source and destination nodes that the destination node is the owner of the slot.

Below is shown an existing cluster where the slots are equally divided between nodes.
Also, each node has some data.


We will try to move a slot, say slot no 102, from redis running on port 7000 to redis running on port 7001
The java code for it is below.


import java.util.List;

import com.google.common.collect.Lists;
import com.lambdaworks.redis.MigrateArgs;
import com.lambdaworks.redis.RedisClient;
import com.lambdaworks.redis.RedisURI;
import com.lambdaworks.redis.api.sync.RedisCommands;
import com.lambdaworks.redis.cluster.models.partitions.ClusterPartitionParser;
import com.lambdaworks.redis.cluster.models.partitions.Partitions;
import com.lambdaworks.redis.cluster.models.partitions.RedisClusterNode;
import com.lambdaworks.redis.codec.Utf8StringCodec;
import com.lambdaworks.redis.protocol.CommandArgs;

public class RedisMoveSingleSlot {
public static void main(String[] args){
String sourceHost = "127.0.0.1";
int sourcePort = 7000;
String destHost = "127.0.0.1";
int destPort = 7001;
int slotToMove = 102;
moveSlot(sourceHost, sourcePort, destHost, destPort, slotToMove);
}
private static void moveSlot(String sourceHost, int sourcePort, String destHost, int destPort, int slot) {
// create connections to source and destinations.
RedisClient sourceClient = RedisClient.create(RedisURI.create(sourceHost, sourcePort));
RedisClient destinationClient = RedisClient.create(RedisURI.create(destHost, destPort));
RedisCommands<String, String> source = sourceClient.connect().sync();
RedisCommands<String, String> destination = destinationClient.connect().sync();
// get the source node Id and destination Node Id.
String sourceNodeId = source.clusterMyId();
String destinationNodeId = destination.clusterMyId();

//STEP 1, set destination to be importing slot from source.
destination.clusterSetSlotImporting(slot, sourceNodeId);
//STEP 2, set source to be migrating slot to destination.
source.clusterSetSlotMigrating(slot, destinationNodeId);
// STEP 3 starts, we need to move all the keys from source to destination.
List<String> keys = source.clusterGetKeysInSlot(slot, Integer.MAX_VALUE);
// move keys in batches of 100, 
int keySize = 100;
System.out.println("Slot : " + slot + " : got keys of size : " + keys.size() );
if(keys != null && keys.size() > 0){
List<List<String>> listOfListOfKeys = Lists.partition(keys, keySize);
int noOfKeysMoved = 0;
for(List<String> listOfKeys : listOfListOfKeys){
MigrateArgs<String> migrateArgs = new MigrateArgs<>();
migrateArgs.keys(listOfKeys);
migrateArgs.replace();
CommandArgs<String, String> args1 = new CommandArgs<String, String>(new Utf8StringCodec());
migrateArgs.build(args1);
// migrate the keys from source to destination in db 0(default), and will some timeout set, here set to 5000 secs.
source.migrate(destHost, destPort, 0, 5000000, migrateArgs);
noOfKeysMoved = noOfKeysMoved + listOfKeys.size();
System.out.println("totally moved " + noOfKeysMoved + " for slot " + slot);
}
//Thread.sleep(5000);
}
//STEP 3 finished.

// STEP 4, set cluster set slot on source and destination and close the source and destinations.
source.clusterSetSlotNode(slotdestinationNodeId);

destination.clusterSetSlotNode(slotdestinationNodeId);

source.close();
destination.close();

// STEP 4 done.
System.out.println("Moved slot " + slot);
}
}

After the code is executed, it moved 2 keys(which belonged to slot 102) and slot no 102 from redis on 7000 port to redis on 7002 port.
Below was the output of "cluster nodes" and "dbsize" command on each nodes.
Note that the slot 102 moved. Also the no of keys belonging to redis with 7001 port increased by 2.


Storing files in redis

In Redis, data can be stored in various types like String, Hash(HashMap), Set, SortedSet, List etc.
Today we will see the java code to store a file in redis.
File is normally stored in the form of byte array in Redis.
First we start the redis server by executing the below in redis home directory.
src/redis-server


This will start the server.
We can see that there is no data in it by executing the "dbsize" command.


The below java code for uploading the file uses Jedis client, although Lettuce client can also be used.
The code saves redis-3.2.4.tar.gz in the redis, but any other file can also be stored in it.
It will save the byte array in redis. further it will get the data from redis and store it as a file with a different name on the disk.

<pre class="brush: java">
import java.io.File;
import java.io.IOException;
import java.nio.file.Files;
import java.nio.file.Paths;

import redis.clients.jedis.Jedis;

public class RedisUploadFile {

public static void main(String[] args) throws IOException {
String host = "localhost";
int port = 6379;
String filePath = "/Users/test/redis/";
String fileName = "redis-3.2.4.tar.gz";
String newFileName = "new_"+ fileName;
Jedis jedis = new Jedis(host, port);
byte[] bytes = Files.readAllBytes(new File(filePath+fileName).toPath());
byte[] key =
(filePath+fileName).getBytes();
System.out.println("Setting bytes of length:" + bytes.length + " got from file " + filePath + fileName + "in redis.");
jedis.set(key, bytes);

byte[] retrievedBytes = jedis.get(key);
System.out.println("Saving data in file " + filePath + newFileName);
Files.write(Paths.get(filePath+newFileName), retrievedBytes);
System.out.println("Done.");
jedis.close();

}


}
</pre>

After the above code is run, it will save the tar file in the redis, and will download it from redis and save it in a separate name.

After that, we can see that the data is also stored in redis by executing "dbsize" command, which returns 1, "keys *" command which returns the key.
Getting the key returns the stored binary representation of the file.


Also, we can see that the file is also created on the file system.


Friday, 14 October 2016

Renaming Redis Commands and executing Monitor command after renaming.

Renaming commands is one of the important steps to secure your redis instance. It is particularly important to rename commands like
FLUSHDB, FLUSHALL, KEYS, CONFIG, RENAME, MONITOR, SHUTDOWN.

Most of the commands work as expected after renaming. However, the command MONITOR behaves a bit differently.
Here, we have a look at why it behaves differently and what can be done to counter it.

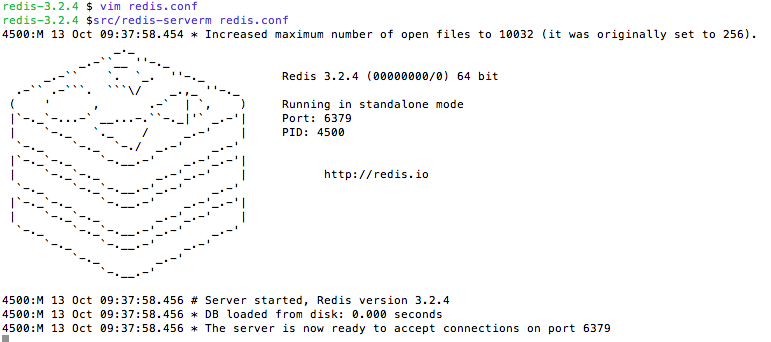
Lets fire up our redis instance on default port 6379 by navigating into redis directory and executing src/redis-server redis.conf


Now, open another command prompt and try to insert some data continuously by executing the below.
while true ; do src/redis-cli set testMonitorKey testMonitorValue ; sleep 1; done


The above will keep on inserting a key in redis. Lets let it run without stopping.

Lets see whether we can use monitor command from redis-cli.
This is done by executing src/redis-cli MONITOR


We can see that the MONITOR command is able to monitor the traffic on the redis instance.
So, monitor command works as expected when it is not renamed.

Now, lets rename the MONITOR command to "EAVESDROP"(or anything else) in redis.conf file.
After that we need to restart the redis server,


Now, lets try to execute monitor command, both original and renamed command(eavesdrop)
src/redis-cli MONITOR
src/redis-cli EAVESDROP


Although MONITOR command gives the error that it is unknown(since we renamed it), it is strange because the terminal waits for the other output!!!
Also, EAVESDROP command just returns OK and does nothing else!!!

One wonders why.
Lets give it another shot.
Lets go inside the redis-shell using redis-cli and execute EAVESDROP and MONITOR separately.


It works!!!! YAY!!!

The issue is that for MONITOR to work properly, both client and server should know that the client has asked for monitoring, so that the client can keep on listening to whatever the server has to feed it.

This can be seen in the redis-cli.c file in redis codebase, that redis-cli listens to MONITOR command.


Now if we rename it at the server, we either need to rename it at the client or send the renamed command to the server and MONITOR command to the client.


When we execute two separate commands like "redis-cli EAVESDROP" and "redis-cli MONITOR", it executes these commands in two separate sessions of redis-cli
Now, when we renamed the MONITOR command to "EAVESDROP", we changed the state at the server but not the client(redis-cli)
When we executed the eavesdrop command, it sent the request to the server to send the data to this client.
However, only after we executed the MONITOR command on redis-cli client, that it was able to listen to it.

But the problem is that the redis-cli shell does not output to a file. What if we have a large number of commands being executed on redis and we want the output to be redirected to a file, so that we can search it easily(or view the tail).
In that case, we should make sure that only one instance of redis-cli should execute both these commands and output it to a file.

This can be done, by creating a file(rename.txt here) and feeding it as input to redis-cli and redirecting the output to an output file.

cat rename.txt 
cat rename.txt | redis-cli > runningCommands.out


Also, in another terminal, look at the output of runningCommands.out using 
tail -f runningCommands.out


So, finally we were able to solve the issue of monitoring the commands in redis-cli after renaming the MONITOR commands. :)


Sunday, 25 September 2016

Redis Cluster - How to create a cluster without redis-trib.rb file

The redis documentation here mentions about creating the redis cluster using a redis-trib.rb script. However, just to know how it works internally, one should know how to create the cluster without the redis-trib.rb script.

This blog assumes that you have 6 redis instances running on ports 7000, 7001, 7002, 7003, 7004, and 7005.

The redis cluster creation involves the below steps.

  1. Starting all the redis nodes in cluster mode.
  2. Making all the nodes meet each other.
  3. Assign slots to the nodes.
  4. Assign slaves to masters.

Step 1: Assuming the redis nodes are started in cluster mode, you need to check whether redis is indeed running using 'ps -ef | grep redis' command.


Step 2: Making the nodes meet each other.
This is done using the cluster meet command as mentioned here.
redis-cli -c -p 7000 cluster meet 127.0.0.1 7001
redis-cli -c -p 7000 cluster meet 127.0.0.1 7002
redis-cli -c -p 7000 cluster meet 127.0.0.1 7003
redis-cli -c -p 7000 cluster meet 127.0.0.1 7004
redis-cli -c -p 7000 cluster meet 127.0.0.1 7005

This way, all the nodes will meet the node 7000, and in turn, each other.


Now all the nodes have met each other. Execute "redis-cli -p 7000 cluster info" command to check the output. It should show the cluster_state as failed, and cluster_slots_assigned as 0.


Step 3: Assign Slots to the nodes.
This is done using the "cluster addslots" command as mentioned here.
Below we use inline shell script to assign the slots to the three nodes and ignore the output by directing it to "/dev/null". If we don't direct the output anywhere, it will still work, only that it will show "OK" many times.

for slot in {0..5461}; do redis-cli -p 7000 CLUSTER ADDSLOTS $slot > /dev/null; done;
for slot in {5462..10923}; do redis-cli -p 7001 CLUSTER ADDSLOTS $slot > /dev/null;; done;
for slot in {10924..16383}; do redis-cli -p 7002 CLUSTER ADDSLOTS $slot > /dev/null;; done;

Each command may take some time, around a minute. Executing "cluster info" after it shows that cluster state is "ok" and cluster_slots_assigned are 16384.


Step 4: Assign Slaves to masters.
Note that we had assigned slots to 7000, 7001, 7002, and plan to make the other nodes as their slaves.
Slaves are assigned using "cluster replicate" command as described here.
The syntax of the command is
"redis-cli -c -p <port_of_slave> cluster replicate <node_id_of_its_master>"
To find the node id of masters, we can use "cluster nodes" command and note the ids corresponding to ports 7000, 7001, 7002.

After that we will execute (Note your node ids will be different than below)
redis-cli -p 7003 cluster replicate 0db8943cccb9b8c3963af78019baf8d2db827f14 
redis-cli -p 7004 cluster replicate add93eed2b5f05371afab5d2611381ebc363d9c7
redis-cli -p 7005 cluster replicate 12e0e6c2e59b8ac284d413623b7d73fd3ec56383

Executing "redis-cli -p 7000 cluster nodes" after it will show that you have slaves also.


Congratulations, your cluster is up and running.
Now, you can add some dummy data in it and start playing around with it.